Press "Enter" to skip to content

//> A L C A T R O N . N E T //> Posts

Allow incoming VPN Users Local LAN access + Internet on Cisco ASA

I wanted to try do something on my Cisco ASA to setup incoming IKEV/IPsec/L2TP VPN to allow access to the local LAN and also the internet connection which the ASA Uses. So when a client connects to the VPN, they can access the local lan, as well as the internet connection that sits off from the ASA.

In order to set this up, we have to have something like this going, all performed in enable configuration mode.

  1. Define your VPN Pool of addresses eg
    ip local pool VPNUsers 192.168.20.1-192.168.20.30 mask 255.255.255.224
  2. Relax the security rules between the interfaces a bit
    same-security-traffic permit intra-interface
  3. Create an object for example like VPN, then NAT the outside interface to the outside, this allows routing of internet from VPN to the ASA using the ASA’s ISP connection on outside
    object network VPN
       subnet 192.168.20.0 255.255.255.224
       nat (outside,outside) dynamic interface 
  4. Allow VPN Interface “Hairpin” on same interface and access to local LAN/Internet resources
    nat (outside,inside) source static VPN VPN
    
  5. Create a VPN Clients Out ACL, to allow the VPN Client subnet, access from its subnet to any IP address on the outside (in our case the local LANs or internet)
    access-list VPN_CLIENTS_OUT extended permit ip object VPN any
  6. Modify the group policy tunnel attributes attached to your tunnel. In my scenario below VPN Clients will use the Cloudflare DNS, utilise the correct ACL for access, allowed IKEV or L2TP protocols, all traffic will be tunneled and no split traffic permitted on client, and the IP address pool will be utilised from our VPNUsers pool

    group-policy yourtunnel attributes
      dns-server value 1.1.1.1 
      vpn-filter value VPN_CLIENTS_OUT
      vpn-tunnel-protocol ikev1 l2tp-ipsec 
      split-tunnel-policy tunnelall
      address-pools value VPNUsers
  7. Once the above is implemented, the VPN clients will have access to the Local LAN, and to the Internet connected to the ASA. The above configuration does not take into consideration the complete VPN Tunnel setup, this additional configuration assumes you already have an existing complete tunnel setup.

    This took me some time to get working, so I wanted to put some of my research on my blog incase anyone wishes to do the same, feedback welcome 🙂

3 Comments

ACCC Monitoring broadband performance

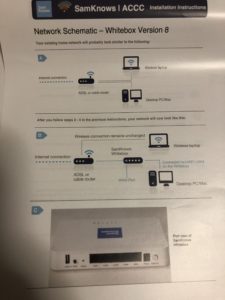
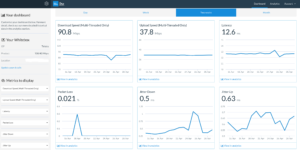
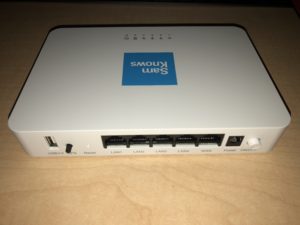
The Australian Federal Government announced a scheme to bring ISPs to account so that they are providing and provisioning enough bandwidth on the NBN and they have setup a broadband monitoring program. I decided to be part of this program, and I have received a monitoring box from Sam Knows One. SamKnows One is a platform that contains a comprehensive set of tools that allows you to measure and analyse your broadband performance, across fixed, mobile and Wi-Fi services. It has a web-based portal that you can use to analyse your measurement results.

The box records the data, and then ACCC have access to this data as well to determine how well the carrier is giving you the performance.

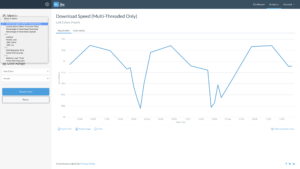
These are some photos how it looks like, and the web portal how performance is measured etc, its quite useful, so you can keep track of your performance. In my scenario my Telstra 100/40 NBN Fibre service is being measured.

If you would like more info on this program see https://www.accc.gov.au/consumers/internet-phone/monitoring-broadband-performance


Leave a Comment

Cisco VPN Client on Windows 10

Need to use the Cisco VPN Client in Windows 10? There is a way to get it working on Windows 10… but it just involves a few additional steps..

  1. Run the installer vpnclient-winx64-msi-5.0.07.0440-k9.exe
  2. Install dneupdate64.msi
  3. Edit the registryWith Regedit open, locate the registry key HKEY_LOCAL_MACHINE and click the drop-down icon. Then do this again for System, CurrentControlSet, Services, and finally, CVirtA.
    From there, double-click DisplayName and change the value data to “Cisco Systems VPN Adapter” (without quotes) if you’re using the x86 32-bit version of the software or “Cisco Systems VPN Adapter for 64-bit Windows” (again, without quotes) if you’re on the 64-bit version.

    For reference, the original value data entry should look like this:
    32-bit (x86): @oem8.ifn,%CVirtA_Desc%;Cisco Systems VPN Adapter
    64-bit (x64): @oem8.ifn,%CVirtA_Desc%;Cisco Systems VPN Adapter for 64-bit Windows

    Once you’ve made the appropriate changes to your registry, restart Windows and you’re done.

Hope this has helped you install it on Windows 10 🙂

Leave a Comment